Arch Linux Installation Guide
This guide covers everything from initial disk encryption with LUKS through to a fully functional desktop environment with i3 window manager, audio, Bluetooth, power management, and media playback inhibitors.
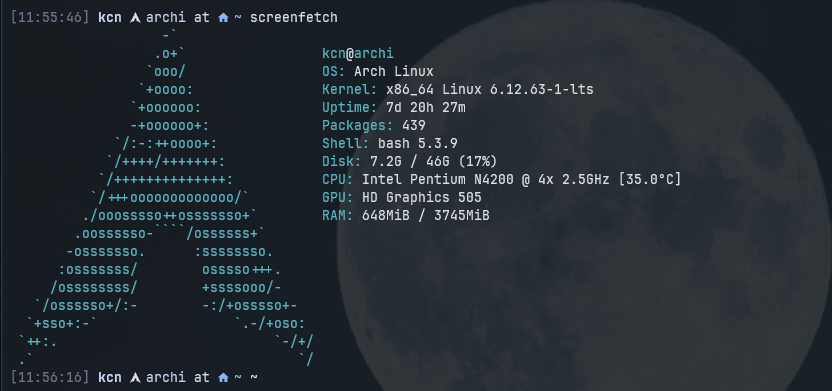
This is a minimalist configuration tailored for my laptop, designed to use as little RAM as possible — full operational under 400MB after boot. Everything is systemd-based, including WiFi management (iwd), ensuring a lean and efficient system.
- ✅ Full disk encryption (LUKS) and automatic decryption with keyfiles
- ✅ i3 window manager
- ✅ Alacritty terminal
- ✅ Brave with GPU acceleration
- ✅ Audio (PipeWire)
- ✅ Bluetooth
- ✅ WiFi
- ✅ Power management
- ✅ Few modern tools and utilities
Pre-Installation
Identify Current Mounts
Partition Disk
Verify Disk Layout
Arch ISO Environment
Connect to WiFi
Verify Network Connection
Set Root Password
Enable SSH Server
SSH Connection (Optional)
Connect from another machine for easier copy-paste:
Disk Partitioning
Partition Scheme
cfdisk

sda 8:0 0 119.2G 0 disk
├─sda1 8:1 0 100M 0 part /boot/efi
├─sda2 8:2 0 21G 0 part  /
├─sda3 8:3 0 25.6G 0 part /home
Load Encryption Modules
Encrypt Partitions with LUKS
# Encrypt root partition
cryptsetup luksFormat -v -s 512 -h sha512 /dev/sda2

# Encrypt home partition
cryptsetup luksFormat -v -s 512 -h sha512 /dev/sda3
Open and Format Encrypted Partitions
# Open the root partition
cryptsetup open /dev/sda2 cryptroot

# Open the home partition
cryptsetup open /dev/sda3 crypthome

# Format root partition
mkfs.ext4 /dev/mapper/cryptroot

# Format home partition
mkfs.ext4 /dev/mapper/crypthome
Mount Partitions
# Mount root to /mnt
mount /dev/mapper/cryptroot /mnt

# Create and mount home directory
mkdir /mnt/home
mount /dev/mapper/crypthome /mnt/home

# Create and mount EFI boot partition
mkdir -p /mnt/boot/efi
mount /dev/sda1 /mnt/boot/efi
Base System Installation
Install Base Packages
Generate Filesystem Table (FSTAB)
Enter New System (Chroot)
System Configuration
Install Text Editor
Configure Initramfs for Encryption
Edit mkinitcpio configuration:
Find the HOOKS=(...) line and change it to:
Key hooks explained:
- systemd – replaces udev, orchestrates boot process in RAM
- sd-vconsole – replaces keymap and consolefont, reads /etc/vconsole.conf for keyboard layout
- sd-encrypt – systemd-based LUKS encryption support
Set Keyboard Layout
Generate Kernel Image
Bootloader (GRUB)
Install GRUB
Get Root Partition UUID
Configure GRUB
Edit /etc/default/grub:
Set the following lines:
GRUB_CMDLINE_LINUX_DEFAULT="loglevel=3 quiet rd.luks.name=YOUR-UUID-SDA2=cryptroot root=/dev/mapper/cryptroot rw"
GRUB_DISABLE_OS_PROBER=false
Install GRUB to EFI
Generate GRUB Configuration
Automatic Decryption (Keyfiles)
Set Permissions and Generate Keys
chmod 700 /etc/cryptsetup-keys.d

# Generate key for ROOT (sda2)
dd if=/dev/urandom of=/etc/cryptsetup-keys.d/root.key bs=512 count=4
chmod 600 /etc/cryptsetup-keys.d/root.key
cryptsetup luksAddKey /dev/sda2 /etc/cryptsetup-keys.d/root.key

# Generate key for HOME (sda3)
dd if=/dev/urandom of=/etc/cryptsetup-keys.d/home.key bs=512 count=4
chmod 600 /etc/cryptsetup-keys.d/home.key
cryptsetup luksAddKey /dev/sda3 /etc/cryptsetup-keys.d/home.key
Add Root Key to Initramfs
Edit /etc/mkinitcpio.conf:
Add:
Add Home Key to Crypttab
echo "crypthome UUID=$(blkid -s UUID -o value /dev/sda3) /etc/cryptsetup-keys.d/home.key luks" >> /etc/crypttab
Rebuild Initramfs
Add Root Key to GRUB
sed -i 's|GRUB_CMDLINE_LINUX_DEFAULT=.*|GRUB_CMDLINE_LINUX_DEFAULT="loglevel=3 quiet rd.luks.name=<ROOT-KEY>=cryptroot root=/dev/mapper/cryptroot rd.luks.key=<ROOT-KEY>=/etc/cryptsetup-keys.d/root.key rw"|' /etc/default/grub
Tip: Use this nvim command to insert UUID:
- Position cursor where UUID should go
- Type:
:r !blkid -s UUID -o value /dev/sda2 - UUID will be inserted at cursor position
Final System Configuration
Set Timezone
Configure NTP (Time Synchronization)
Edit /etc/systemd/timesyncd.conf:
NTP=0.arch.pool.ntp.org 1.arch.pool.ntp.org 2.arch.pool.ntp.org 3.arch.pool.ntp.org
FallbackNTP=0.pool.ntp.org 1.pool.ntp.org
Enable time synchronization:
Set Locale
Edit /etc/locale.gen and uncomment:
Generate locale files:
Set system language:
Set Hostname
Create User
Create user with home directory and add to wheel group for sudo:
Set user password:
Install and Configure Sudo
Set system editor:
Edit sudoers file:
Uncomment this line:
Essential System Tools
iwd (WiFi Management)
Create DNS symlink:
Configure iwd:
SSH Server
zRAM (Compressed Swap in RAM)
Configure zRAM:
Reboot into New System
Desktop Environment Setup
Xorg Display Server
xorg-server– core display serverxorg-xinit– manual start capability (startx)xorg-xrandr– resolution and monitor management
Note: We don't install xorg-drivers meta-package (too much bloat)
Auto-start X on Login
Edit bash profile:
Create xinitrc:
Intel GPU Driver
i3 (Window Manager)
Picom (Compositor)
Create config directory:
Configure picom:
backend = "glx";
vsync = true;

shadow = true;
shadow-radius = 8;
shadow-offset-x = -4;
shadow-offset-y = -4;

opacity-rule = [
  "90:class_g = 'Alacritty'"
];
Auto-start in i3:
Fonts
Install Fonts
sudo pacman -S ttf-jetbrains-mono
sudo pacman -S ttf-jetbrains-mono-nerd
sudo pacman -S ttf-font-awesome
sudo pacman -S fontconfig
Configure Font Rendering
<?xml version="1.0"?>
<!DOCTYPE fontconfig SYSTEM "fonts.dtd">
<fontconfig>
    <match target="font">
        <edit name="hinting" mode="assign"><bool>true</bool></edit>
        <edit name="hintstyle" mode="assign"><const>hintslight</const></edit>
        <edit name="antialias" mode="assign"><bool>true</bool></edit>
        <edit name="rgba" mode="assign"><const>rgb</const></edit>
    </match>
</fontconfig>
Refresh Font Cache
Set i3 Font
Edit i3 config:
Terminal Emulator (Alacritty)
Install Alacritty
Configure Alacritty
[font]
size = 8.5

[font.normal]
family = "JetBrainsMono Nerd Font Mono"
style = "Regular"

[font.bold]
family = "JetBrainsMono Nerd Font Mono"
style = "Bold"

[font.italic]
family = "JetBrainsMono Nerd Font Mono"
style = "Italic"

[window]
padding = { x = 6, y = 6 }

[env]
TERM = "xterm-256color"
Add Terminal Keybinding to i3
Audio (PipeWire)
Install PipeWire
Enable Audio Services
Important: Use --user flag (user service, not system-wide):
Verify Audio Works
Volume Control Keybindings
Edit i3 config:
# Auto-start audio services
exec --no-startup-id /usr/bin/pipewire
exec --no-startup-id /usr/bin/wireplumber

# Volume keybindings
bindsym XF86AudioRaiseVolume exec --no-startup-id pactl set-sink-volume @DEFAULT_SINK@ +5%
bindsym XF86AudioLowerVolume exec --no-startup-id pactl set-sink-volume @DEFAULT_SINK@ -5%
bindsym XF86AudioMute exec --no-startup-id pactl set-sink-mute @DEFAULT_SINK@ toggle
Screen Brightness
Install Brightness Control
sudo pacman -S brightnessctl

# Add user to video group (allows control without sudo)
sudo usermod -aG video $USER
Brightness Keybindings
Edit i3 config:
bindsym XF86MonBrightnessUp exec --no-startup-id brightnessctl set +10%
bindsym XF86MonBrightnessDown exec --no-startup-id brightnessctl set 10%-
Bluetooth
Install Bluetooth Stack
# Install bluetooth backend
sudo pacman -S bluez bluez-utils

# Enable bluetooth service
sudo systemctl enable --now bluetooth
Manage Bluetooth Devices
Use bluetoothctl command-line tool:
Commands inside bluetoothctl:
Optional: Blueman GUI
Auto-start in i3:
Web Browser (Brave)
Install AUR Helper (yay)
sudo pacman -S --needed base-devel git
git clone https://aur.archlinux.org/yay-bin.git
cd yay-bin
makepkg -si
Install Brave Browser
Enable GPU Acceleration in Brave
- Open Brave and navigate to:
brave://flags - Find and set to Enabled:
- Override software rendering list (forces GPU usage)
- Hardware-accelerated video decode (offloads video to GPU)
-
GPU Rasterization
-
Verify GPU acceleration:
brave://gpu - Look for green "Hardware accelerated" entries
Brave Keybindings
Edit i3 config:
# Launch YouTube as web app
bindsym $mod+y exec brave --app=https://youtube.com --class=YoutubeApp

# Launch full Brave browser
bindsym $mod+Shift+y exec brave
Additional Tools
System Utilities
btop– system monitorscreenfetch– system info displaybat– cat replacement with syntax highlightingeza– ls replacement with colorsfzf– fuzzy finderfd– find replacementripgrep– grep replacement
Starship Prompt
Laptop Hardware Keys
Unblock Wireless Devices
# Check blocked devices
rfkill list

# Unblock WiFi
sudo rfkill unblock wifi

# Unblock Bluetooth
sudo rfkill unblock bluetooth

# Or unblock everything
sudo rfkill unblock all
Suspend on Lid Close
Check if hardware detects lid state:
If you see open/closed → hardware works correctly.
Configure Lid Switch Behavior
Edit logind configuration:
Apply changes:
Suspend After Idle Time
Edit logind configuration:
Prevent Suspend During Media Playback
Install PlayerCTL
Create Inhibitor Script
#!/bin/bash

while true; do
    if playerctl status 2>/dev/null | grep -q Playing; then
        systemd-inhibit \
          --what=sleep \
          --why="Media playback" \
          --mode=block \
          sleep 30
    else
        sleep 30
    fi
done
Make executable:
Create systemd User Service
[Unit]
Description=Block suspend while media is playing

[Service]
ExecStart=%h/.local/bin/media-inhibit.sh
Restart=always

[Install]
WantedBy=default.target
Enable Service
Test Inhibitor
Check if inhibitor is active during media playback: